-
liteCam HDScreen Recorder

-
liteCam AndroidAndroid Screen Recorder

-
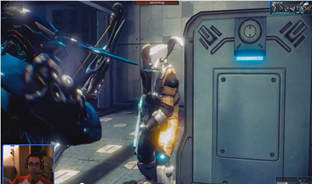
liteCam Game120FPS Game Capture

-

liteCam is an easy to use screen recorder which allows you to save a compact AVI file at virtually the same quality!
-

liteCam HD is a video editing software that allows windows users to record and capture anything on their PC screen.
-

Thanks to a dummy-proof interface, liteCam provides a very easy way in which to capture screen recordings.
-

“We recommend this program if you need to record several types of media in addition to videos.”
-
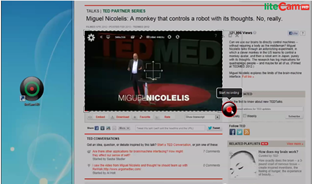
Record anything you do or see.
Capture and record anything on your computer’s screen or Android device with liteCam. From streaming videos to online lectures and courses, video conferences and Skype calls, to Facebook video chat. You can even capture videos from YouTube, Vimeo and more. Create your own professional quality videos in full 1080p HD with liteCam HD, record and livestream your gameplay at a full 120 FPS with liteCam Game recorder, anything from League of Legends, Mine Craft, Counter Strike and more. Use liteCam Android to record and capture anything on your mobile device. Anything is possible with a liteCam screen recorder!Read more

-
Record 1080P HD videos with no lag and a Small file size.
The RSUPPORT Screen Capture Codec (RSCC) has been specialized to capture stunning quality videos in full 1080p HD, while simultaneously minimizing the system resources needed to record videos and compressing your videos the file size all at the same time. The RSCC offers higher quality compression and is 30% faster than typical codecs. The RSCC fully supports 64-bit operating system and also supports video for windows and DirectShow filter based codec.Read more

-
Increase video Encoding performance with Hardware Acceleration.
Hardware acceleration gives you an incredible speed boost. liteCam now supports NVIDIA CUDA, AMD APP, and Intel Quick Sync Video in H.264 encoder. It especially helps reduce resource consumption to render your video along with software/videos/games/apps simultaneously. liteCam HD optimizes video performance by using hardware acceleration for H.264 encoding. It significantly reduces CPU load for HD videos.

-
Add effects & edits to your recorded videos.
Use the Picture in Picture (PiP) feature to include helpful commentary to enhance your video demos, presentation, or even live streaming game recording. All liteCam softwares come with helpful recording, and post effect editing tools such as mouse cursor effects, on screen drawing, and title, ending credits, and logo options as well as audio editing, and video trimming. And of course you can record both computer and microphone audio simultaneously.Read more

-
Share and watch recorded videos on any device.
Share your recorded videos by uploading them to YouTube, Facebook, Vimeo, or any other video hosting site. You can also watch your recorded videos on any mobile devices such as iPhones, Android devices, tablets, and even music players, by converting the your videos to a anything from AVI, MP4, or WMV format, you can even convert the recorded audio to WAV, WMA, and MP3.